Hello! Today, we’ll explore how to leverage Backstage Scaffolder, a core component of platform engineering, to “spin up standard projects with security guardrails.”
We’ll share how to manage, through code, not just “copying code,” but who creates it, for what purpose, and in compliance with which security policies. 🛠️
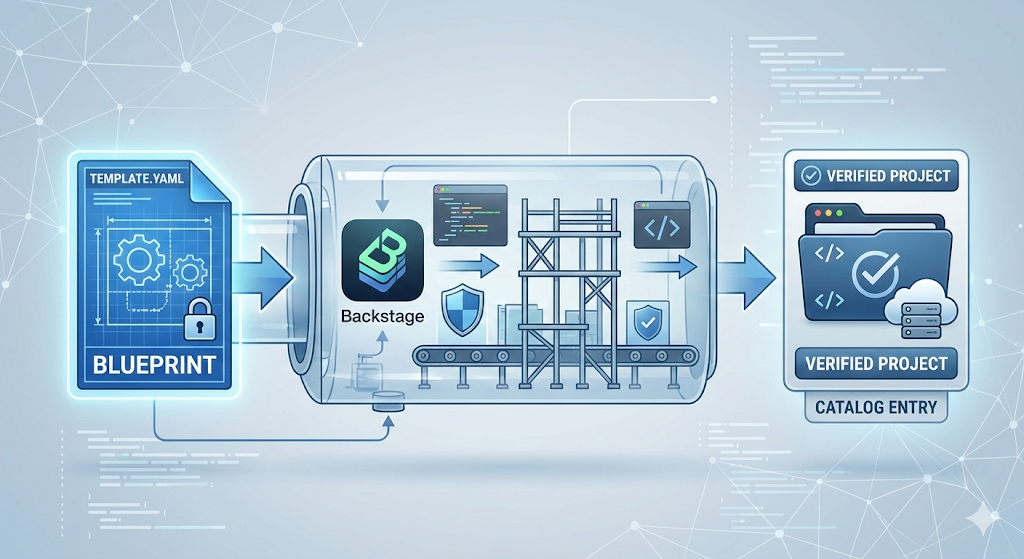
1. Anatomy of a Template 🦴
A Backstage template is broadly divided into Metadata (name, description), Parameters (user input), Steps (execution stages), and Output (result guidance).
YAML
# 1. Defining the template's identity
apiVersion: scaffolder.backstage.io/v1beta3
kind: Template
metadata:
  name: standard-python-service
  title: "🛡️ 보안 표준 Python Flask 서비스"
  description: "KISA 보안 가이드라인과 CI/CD 스캔이 내장된 표준 API 서버를 생성합니다."
  tags: [standard, security, python]

spec:
  owner: platform-team
  type: service

  # 2. 'Questionnaire' to receive input from the user
  parameters:
    - title: "기본 정보"
      required: [component_id, owner]
      properties:
        component_id:
          title: "서비스 이름"
          type: string
          description: "생성할 프로젝트의 이름 (영문/숫자/-)"
        owner:
          title: "담당 팀"
          type: string
          ui:field: OwnerPicker # Select Backstage registration group

    - title: "저장소 설정"
      required: [repoUrl]
      properties:
        repoUrl:
          title: "GitHub 위치"
          type: string
          ui:field: RepoUrlPicker # Select repository creation location
          ui:options:
            allowedHosts: [github.com]

  # 3. The 'automation process' where the real magic happens
  steps:
    - id: fetch-base
      name: "표준 스켈레톤 가져오기"
      action: fetch:template
      input:
        url: ./skeleton # Template source folder
        values:
          name: ${{ parameters.component_id }}
          owner: ${{ parameters.owner }}

    - id: publish
      name: "GitHub 저장소 생성 및 푸시"
      action: publish:github
      input:
        allowedHosts: ['github.com']
        description: "Created by Backstage Scaffolder"
        repoUrl: ${{ parameters.repoUrl }}

    - id: register
      name: "카탈로그 자동 등록"
      action: catalog:register
      input:
        repoContentsUrl: ${{ steps['publish'].output.remoteUrl }}
        catalogInfoPath: '/catalog-info.yaml'

  # 4. Results to show the user after completion
  output:
    links:
      - title: "생성된 GitHub 저장소 보기"
        url: ${{ steps['publish'].output.remoteUrl }}
2. Detailed Code Explanation for Each Core Step 🔍
📍 Parameters: The Art of Data Input
The information users input is not just plain text. Using ui:field calls advanced components integrated with the Backstage system.
- OwnerPicker: Real-time search and selection of teams registered in the organizational chart. 👥
- RepoUrlPicker: Selects an authorized GitHub organization and instantly determines the repository name.
📍 Steps: The Core Engine of Automation
- fetch:template: This is the most crucial step. It copies files from the ./skeleton folder and ‘substitutes’ variables like ${{ values.name }} with the actual values entered by the user.
- publish:github: More than just uploading code, it creates a new repository via the GitHub API and makes an initial commit. 🛰️
- catalog:register: Ensures the newly created service immediately appears in the Backstage management list (Catalog), preventing “shadow IT.”
3. The Heart of the Project: The Skeleton Folder 🦴
What’s inside the ./skeleton folder that the template references? It’s the standard specification.
./skeleton/catalog-info.yaml (Example) This file is created along with the project and acts as the service’s ‘identity card’.
YAML
apiVersion: backstage.io/v1alpha1
kind: Component
metadata:
  name: ${{ values.name | dump }}
  description: "이 서비스는 표준 템플릿으로 자동 생성되었습니다."
spec:
  type: service
  lifecycle: experimental
  owner: ${{ values.owner | dump }} # The team entered during creation is automatically assigned as the owner!
Tip: By using ${{ values.owner }} here, ownership management is automatically handled upon creation. 🛡️
4. The Results This Blueprint Delivers 🎁
Executing this template provides developers with the following deliverables within one minute:
- GitHub Repository: A repository with a standard code structure and CI/CD (GitHub Actions) setup completed. 📁
- Security Settings: Starts with security scan configurations like Trivy or Snyk included by default. 🔒
- Management Automation: Registered in the Backstage Catalog, allowing immediate verification of dependency graphs and documentation (TechDocs). 📡
🔥 Conclusion: Why Manage with Code?
If developers manually write catalog-info.yaml and configure GitHub settings, typos or omitted security settings are common. However, with a Scaffolder blueprint, “organizational standard policies” become the “starting point of the project”.
Now, apply this code to your Backstage! Your platform engineering journey will become even more robust. 🚀
Leave a Reply