Building a Local CVE Analyst with Flask + Ollama + NVD API
In this tutorial, we will build a web application by leveraging an Ollama container already running on a GPU.
Instead of just a “chatbot that asks LLMs questions,” we will configure it to fetch real data from an external API and have a local LLM analyze that data. The example app we will build is a Local CVE Analyst.
When a user enters a CVE ID or keyword, the Flask app queries vulnerability information from the NVD API, and a local LLM running on Ollama summarizes and analyzes the vulnerability in Korean.
Ollama’s /api/chat endpoint can generate conversational responses by taking model and messages as input, and it primarily uses streaming responses. In this tutorial, we will use stream: false for easier handling in Flask.
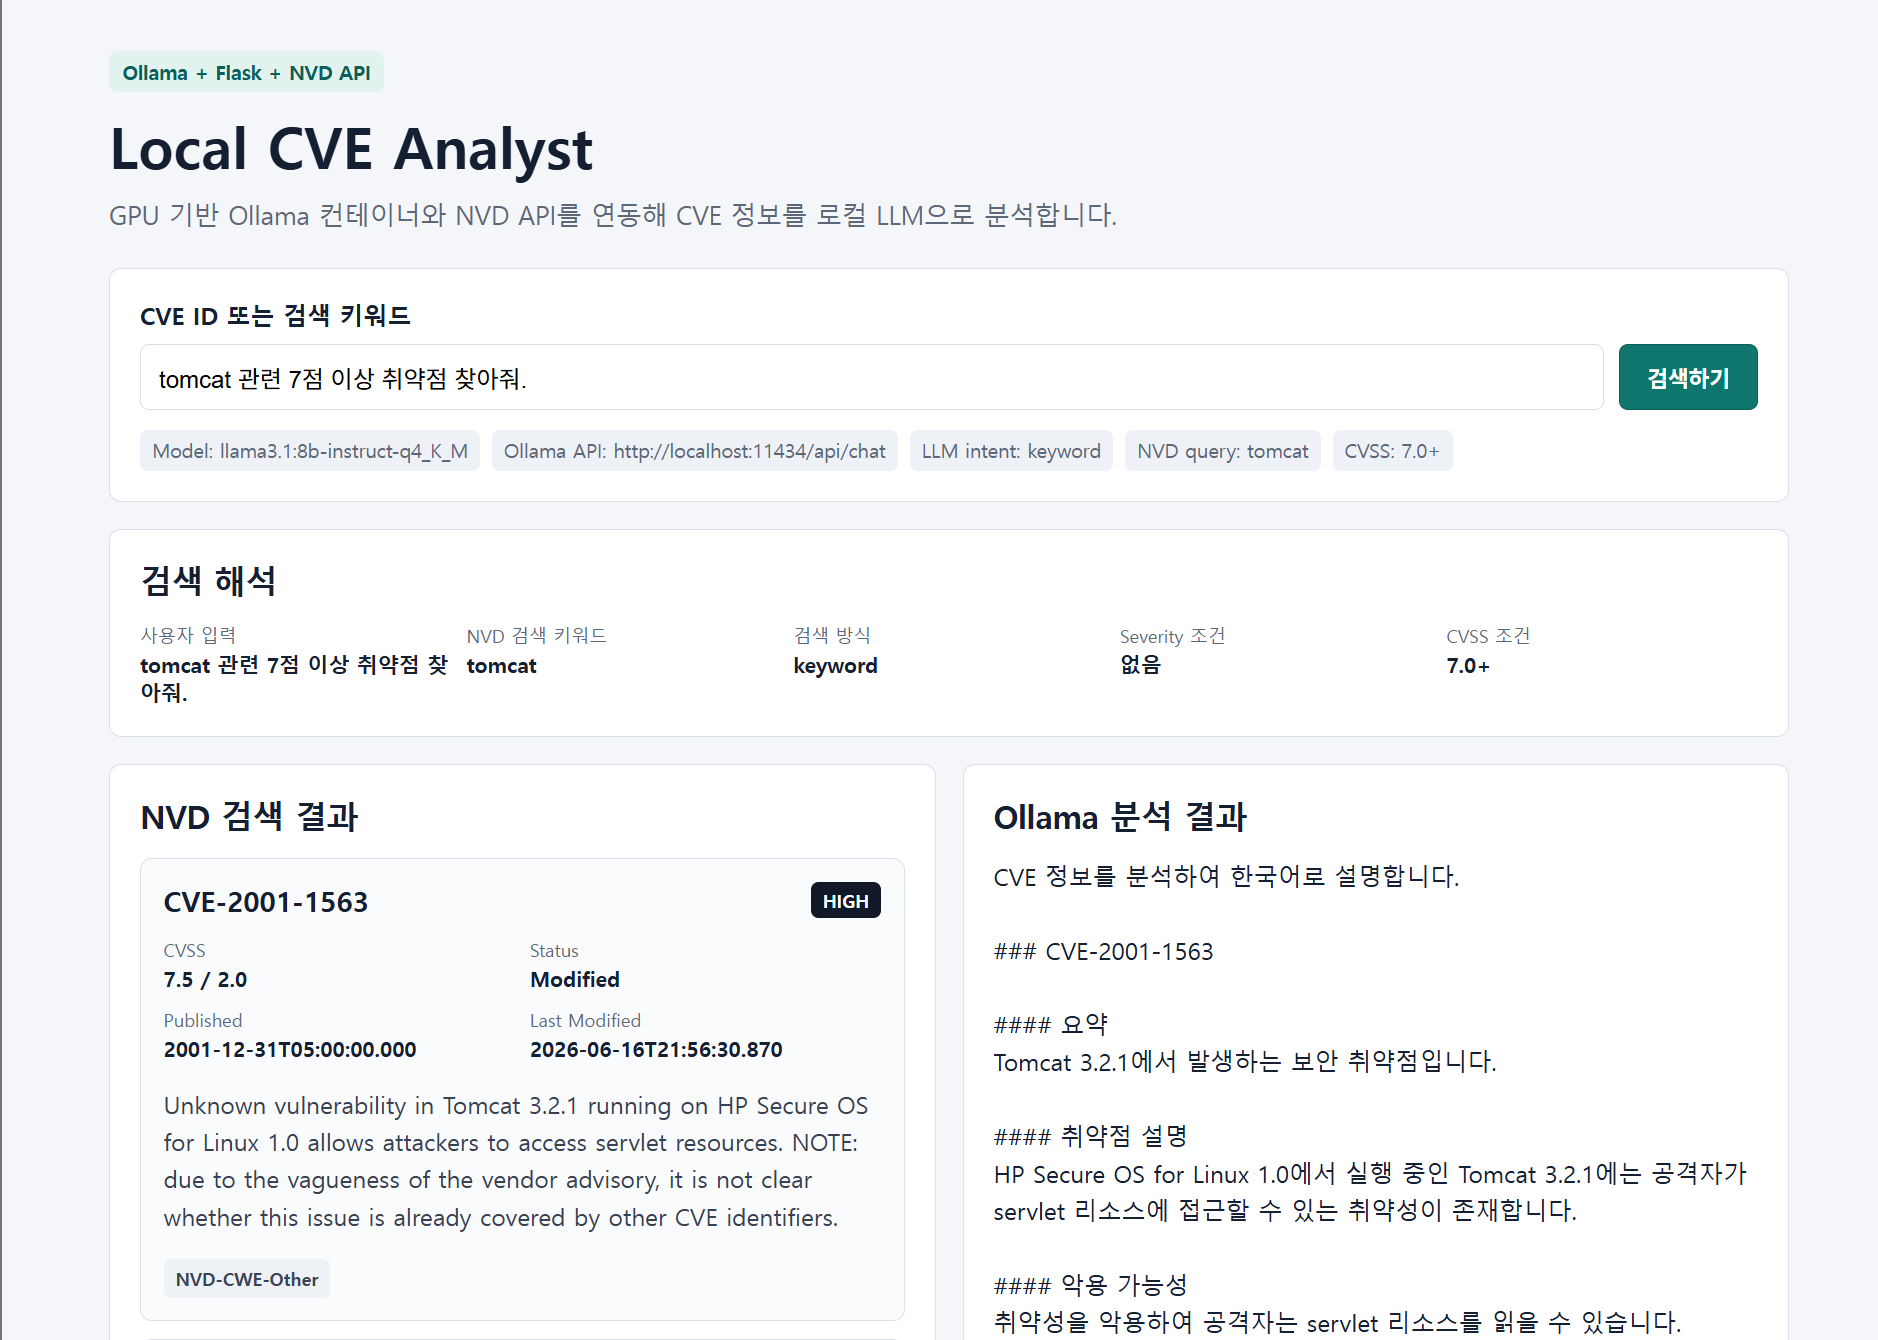
1. Completed App Structure
The structure we will build is as follows:
사용자 브라우저
    ↓
Flask Web UI
    ↓
Flask Backend
    ├── NVD CVE API 호출
    └── Ollama API 호출
            ↓
      로컬 GPU LLM 응답 생성
            ↓
사용자 화면에 CVE 원본 정보 + AI 분석 결과 출력
The key is that the Flask server plays two roles in the middle.
First, it calls the NVD API with the CVE ID or keyword entered by the user.
Second, it passes the vulnerability information retrieved from NVD to Ollama to get analysis results.
In this tutorial, we will not have the LLM directly call the API; instead, Flask will explicitly call the API and then pass the results to the LLM. This makes it easier for beginners to understand the flow and reduces errors during practice.
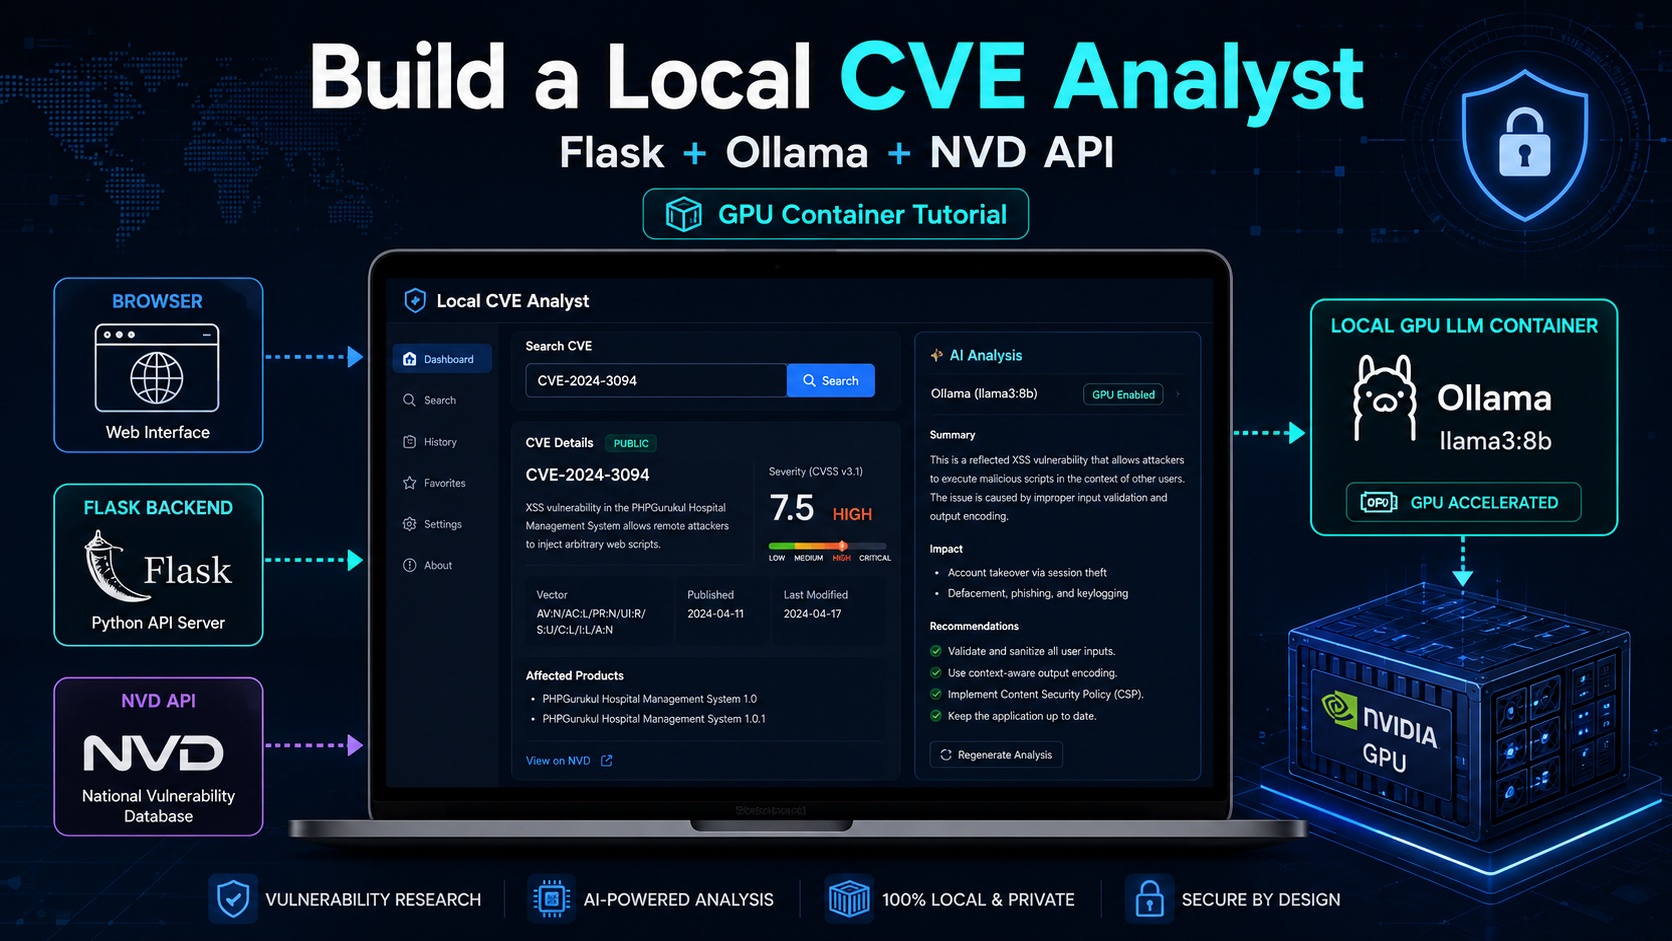
2. Prerequisites
This tutorial assumes the following state:
1. Ollama 컨테이너가 이미 실행 중이다.
2. Ollama 컨테이너가 GPU를 사용하도록 구성되어 있다.
3. Ollama API 포트 11434에 접근할 수 있다.
4. 사용할 모델이 이미 pull 되어 있거나, pull 할 수 있다.
For example, the following command should work correctly on the host:
curl http://localhost:11434/api/tagsThe response example is similar to this:
{
  "models": [
    {
      "name": "llama3.1:latest"
    }
  ]
}
Let’s also check a simple chat call.
curl http://localhost:11434/api/chat
  -H "Content-Type: application/json"
  -d '{
    "model": "llama3.1",
    "messages": [
      {
        "role": "user",
        "content": "Ollama가 무엇인지 한 문장으로 설명해줘."
      }
    ],
    "stream": false
  }'
Using stream: false returns the response as a single JSON object instead of multiple chunks, making it easier to handle in a Flask app.
3. Creating the Project Directory
First, create the project directory.
mkdir ollama-flask-cve-app
cd ollama-flask-cve-app
The overall structure is as follows:
ollama-flask-cve-app/
├── app.py
├── requirements.txt
├── Dockerfile
├── docker-compose.app.yml
├── templates/
│   └── index.html
└── static/
    └── style.css
Flask typically looks for HTML templates in the templates directory and uses the render_template() function to render HTML pages.
4. Defining Python Packages
Create the requirements.txt file.
Flask==3.1.1
requests==2.32.4
Flask handles the web UI and routing, while requests is used to call the Ollama API and NVD API.
5. Writing the Flask Backend
Now, let’s write app.py.
import os
import re
from typing import Any, Dict, List, Optional

import requests
from flask import Flask, render_template, request

app = Flask(__name__)

# Use localhost if the Ollama container is exposed on port 11434 on the host
# If the Flask app is also run as a container and attached to the same network as the Ollama container
# e.g., http://lab-ollama:11434/api/chat or http://ollama:11434/api/chat
OLLAMA_URL = os.getenv("OLLAMA_URL", "http://localhost:11434/api/chat")
OLLAMA_MODEL = os.getenv("OLLAMA_MODEL", "llama3.1")

# NVD CVE API 2.0
NVD_API_URL = "https://services.nvd.nist.gov/rest/json/cves/2.0"

# Optional: NVD API Key
# If you have an API Key, specify it as an environment variable.
# export NVD_API_KEY="your-api-key"
NVD_API_KEY = os.getenv("NVD_API_KEY", "")

# Maximum number of CVEs to fetch when searching by keyword
NVD_RESULTS_PER_PAGE = int(os.getenv("NVD_RESULTS_PER_PAGE", "5"))

def is_cve_id(keyword: str) -> bool:
    """
    입력값이 CVE ID 형식인지 확인합니다.
    예: CVE-2024-3094
    """
    return bool(re.fullmatch(r"CVE-d{4}-d{4,}", keyword.strip(), re.IGNORECASE))

def call_nvd_api(keyword: str) -> Dict[str, Any]:
    """
    NVD API에서 CVE 정보를 가져옵니다.

    CVE ID가 입력되면 cveIds 파라미터를 사용하고,
    일반 키워드가 입력되면 keywordSearch 파라미터를 사용합니다.
    """
    keyword = keyword.strip()

    if is_cve_id(keyword):
        params = {
            "cveIds": keyword.upper()
        }
    else:
        params = {
            "keywordSearch": keyword,
            "resultsPerPage": NVD_RESULTS_PER_PAGE
        }

    headers = {}

    if NVD_API_KEY:
        headers["apiKey"] = NVD_API_KEY

    response = requests.get(
        NVD_API_URL,
        params=params,
        headers=headers,
        timeout=30
    )

    response.raise_for_status()
    return response.json()

def get_english_description(cve: Dict[str, Any]) -> str:
    """
    CVE 설명 중 영어 설명을 우선 추출합니다.
    """
    descriptions = cve.get("descriptions", [])

    for item in descriptions:
        if item.get("lang") == "en":
            return item.get("value", "")

    if descriptions:
        return descriptions[0].get("value", "")

    return ""

def get_cvss_info(cve: Dict[str, Any]) -> Dict[str, str]:
    """
    CVSS 정보를 추출합니다.
    CVSS v4.0, v3.1, v3.0, v2 순서로 확인합니다.
    """
    metrics = cve.get("metrics", {})

    metric_order = [
        "cvssMetricV40",
        "cvssMetricV31",
        "cvssMetricV30",
        "cvssMetricV2",
    ]

    for metric_key in metric_order:
        metric_items = metrics.get(metric_key)

        if not metric_items:
            continue

        metric = metric_items[0]
        cvss_data = metric.get("cvssData", {})

        return {
            "version": str(cvss_data.get("version", metric_key)),
            "score": str(cvss_data.get("baseScore", "UNKNOWN")),
            "severity": str(
                metric.get("baseSeverity")
                or cvss_data.get("baseSeverity")
                or "UNKNOWN"
            ),
            "vector": str(cvss_data.get("vectorString", "UNKNOWN")),
        }

    return {
        "version": "UNKNOWN",
        "score": "UNKNOWN",
        "severity": "UNKNOWN",
        "vector": "UNKNOWN",
    }

def get_cwe_list(cve: Dict[str, Any]) -> List[str]:
    """
    CWE 목록을 추출합니다.
    """
    weaknesses = cve.get("weaknesses", [])
    cwe_list = []

    for weakness in weaknesses:
        for desc in weakness.get("description", []):
            value = desc.get("value")
            if value:
                cwe_list.append(value)

    return sorted(set(cwe_list))

def get_reference_urls(cve: Dict[str, Any], limit: int = 5) -> List[str]:
    """
    참고 URL을 일부만 추출합니다.
    """
    references = cve.get("references", {}).get("referenceData", [])
    urls = []

    for ref in references[:limit]:
        url = ref.get("url")
        if url:
            urls.append(url)

    return urls

def extract_cve_items(nvd_data: Dict[str, Any]) -> List[Dict[str, Any]]:
    """
    NVD API 응답에서 화면과 프롬프트에 사용할 정보만 추출합니다.
    """
    vulnerabilities = nvd_data.get("vulnerabilities", [])
    result = []

    for item in vulnerabilities:
        cve = item.get("cve", {})
        cvss = get_cvss_info(cve)

        result.append(
            {
                "id": cve.get("id", "UNKNOWN"),
                "published": cve.get("published", "UNKNOWN"),
                "last_modified": cve.get("lastModified", "UNKNOWN"),
                "status": cve.get("vulnStatus", "UNKNOWN"),
                "description": get_english_description(cve),
                "cvss_version": cvss["version"],
                "cvss_score": cvss["score"],
                "severity": cvss["severity"],
                "vector": cvss["vector"],
                "cwe": get_cwe_list(cve),
                "references": get_reference_urls(cve),
            }
        )

    return result

def format_cve_items_for_prompt(cve_items: List[Dict[str, Any]]) -> str:
    """
    Ollama에게 전달할 텍스트를 만듭니다.
    원본 JSON 전체를 넘기지 않고 필요한 필드만 전달합니다.
    """
    if not cve_items:
        return "검색 결과가 없습니다."

    lines = []

    for item in cve_items:
        cwe_text = ", ".join(item["cwe"]) if item["cwe"] else "UNKNOWN"
        ref_text = "
".join(item["references"]) if item["references"] else "NONE"

        lines.append(
            f"""
CVE ID: {item["id"]}
Published: {item["published"]}
Last Modified: {item["last_modified"]}
Status: {item["status"]}
Severity: {item["severity"]}
CVSS Version: {item["cvss_version"]}
CVSS Score: {item["cvss_score"]}
CVSS Vector: {item["vector"]}
CWE: {cwe_text}
Description:
{item["description"]}

References:
{ref_text}
"""
        )

    return "
---
".join(lines)

def ask_ollama(cve_text: str) -> str:
    """
    Ollama API를 호출해 CVE 분석 결과를 생성합니다.
    """
    prompt = f"""
너는 보안 분석가다.
아래 CVE 정보를 바탕으로 한국어로 분석해라.

반드시 지켜야 할 규칙:
1. 제공된 CVE 정보에 근거해서만 설명한다.
2. 원문에 없는 공격 절차를 과장해서 만들지 않는다.
3. 초보자도 이해할 수 있게 설명한다.
4. 운영자 관점의 대응 방안을 제시한다.
5. 출력은 다음 형식을 따른다.

출력 형식:
## 요약
## 취약점 설명
## 악용 가능성
## 위험도 판단
## 운영자 대응 방안
## 참고할 점

CVE 정보:
{cve_text}
"""

    payload = {
        "model": OLLAMA_MODEL,
        "messages": [
            {
                "role": "user",
                "content": prompt
            }
        ],
        "stream": False,
        "options": {
            "temperature": 0.2
        }
    }

    response = requests.post(
        OLLAMA_URL,
        json=payload,
        timeout=180
    )

    response.raise_for_status()
    data = response.json()

    return data.get("message", {}).get("content", "")

@app.route("/", methods=["GET", "POST"])
def index():
    """
    메인 페이지입니다.
    GET 요청이면 검색 폼만 보여주고,
    POST 요청이면 NVD API 조회 후 Ollama 분석 결과를 보여줍니다.
    """
    query = ""
    cve_items = []
    cve_prompt_text = ""
    analysis_result = ""
    error = ""

    if request.method == "POST":
        query = request.form.get("query", "").strip()

        if not query:
            error = "CVE ID 또는 검색 키워드를 입력하세요."
        else:
            try:
                nvd_data = call_nvd_api(query)
                cve_items = extract_cve_items(nvd_data)
                cve_prompt_text = format_cve_items_for_prompt(cve_items)

                if cve_items:
                    analysis_result = ask_ollama(cve_prompt_text)
                else:
                    error = "NVD API에서 검색 결과를 찾지 못했습니다."

            except requests.exceptions.HTTPError as e:
                error = f"HTTP 오류가 발생했습니다: {e}"
            except requests.exceptions.Timeout:
                error = "요청 시간이 초과되었습니다. 모델이 너무 크거나 API 응답이 느릴 수 있습니다."
            except requests.exceptions.RequestException as e:
                error = f"API 호출 중 오류가 발생했습니다: {e}"
            except Exception as e:
                error = f"처리 중 예상하지 못한 오류가 발생했습니다: {e}"

    return render_template(
        "index.html",
        query=query,
        model=OLLAMA_MODEL,
        ollama_url=OLLAMA_URL,
        cve_items=cve_items,
        cve_prompt_text=cve_prompt_text,
        analysis_result=analysis_result,
        error=error,
    )

if __name__ == "__main__":
    app.run(
        host="0.0.0.0",
        port=5000,
        debug=True
    )
The base URL for the NVD CVE API 2.0 is
Also, the NVD API Key is passed in the request header in the format apiKey:{key value}. Without an API Key, there is a limit of 5 requests per 30 seconds; with an API Key, the limit is 50 requests per 30 seconds.
6. Writing the HTML UI
Now, create the templates/index.html file.
<!DOCTYPE html>
<html lang="ko">
<head>
  <meta charset="UTF-8" />
  <meta name="viewport" content="width=device-width, initial-scale=1.0" />

  <title>Local CVE Analyst</title>

  <link
    rel="stylesheet"
    href="{{ url_for('static', filename='style.css') }}"
  />
</head>
<body>
  <main class="page">
    <section class="hero">
      <div class="badge">Ollama + Flask + NVD API</div>
      <h1>Local CVE Analyst</h1>
      <p>
        GPU 기반 Ollama 컨테이너와 NVD API를 연동해
        CVE 정보를 로컬 LLM으로 분석하는 보안 AI 웹앱입니다.
      </p>
    </section>

    <section class="panel">
      <form method="POST" class="search-form">
        <label for="query">CVE ID 또는 검색 키워드</label>

        <div class="input-row">
          <input
            id="query"
            name="query"
            type="text"
            value="{{ query }}"
            placeholder="예: CVE-2024-3094 또는 openssl"
            autocomplete="off"
          />

          <button type="submit">
            분석하기
          </button>
        </div>
      </form>

      <div class="runtime-info">
        <span>Model: {{ model }}</span>
        <span>Ollama API: {{ ollama_url }}</span>
      </div>
    </section>

    {% if error %}
    <section class="alert">
      {{ error }}
    </section>
    {% endif %}

    {% if cve_items %}
    <section class="grid">
      <div class="panel">
        <h2>NVD 검색 결과</h2>

        {% for item in cve_items %}
        <article class="cve-card">
          <div class="cve-header">
            <h3>{{ item.id }}</h3>
            <span class="severity">{{ item.severity }}</span>
          </div>

          <dl>
            <div>
              <dt>CVSS</dt>
              <dd>{{ item.cvss_score }} / {{ item.cvss_version }}</dd>
            </div>
            <div>
              <dt>Status</dt>
              <dd>{{ item.status }}</dd>
            </div>
            <div>
              <dt>Published</dt>
              <dd>{{ item.published }}</dd>
            </div>
            <div>
              <dt>Last Modified</dt>
              <dd>{{ item.last_modified }}</dd>
            </div>
          </dl>

          <p class="description">
            {{ item.description }}
          </p>

          {% if item.cwe %}
          <div class="chips">
            {% for cwe in item.cwe %}
            <span>{{ cwe }}</span>
            {% endfor %}
          </div>
          {% endif %}
        </article>
        {% endfor %}
      </div>

      <div class="panel">
        <h2>Ollama 분석 결과</h2>

        {% if analysis_result %}
        <pre class="analysis">{{ analysis_result }}</pre>
        {% else %}
        <p class="muted">분석 결과가 없습니다.</p>
        {% endif %}
      </div>
    </section>

    <section class="panel">
      <h2>LLM에 전달한 요약 데이터</h2>
      <pre class="raw">{{ cve_prompt_text }}</pre>
    </section>
    {% endif %}
  </main>
</body>
</html>
The important point here is that analysis_result is not treated as safe. Trusting LLM responses or external API responses as HTML can lead to XSS issues. Therefore, we use the
tag and CSS white-space processing to display line breaks naturally.7. Writing CSS
Create the static/style.css file.
:root { --bg: #f3f4f6; --panel: #ffffff; --text: #111827; --muted: #6b7280; --border: #e5e7eb; --primary: #111827; --primary-hover: #374151; --danger-bg: #fee2e2; --danger-text: #991b1b; --code-bg: #0f172a; --code-text: #e5e7eb; } * { box-sizing: border-box; } body { margin: 0; font-family: -apple-system, BlinkMacSystemFont, "Segoe UI", "Noto Sans KR", Arial, sans-serif; background: var(--bg); color: var(--text); } .page { width: 1120px; max-width: 94%; margin: 40px auto; } .hero { margin-bottom: 24px; } .badge { display: inline-block; padding: 6px 10px; margin-bottom: 12px; border-radius: 999px; background: #e5e7eb; color: #374151; font-size: 13px; font-weight: 700; } .hero h1 { margin: 0 0 12px; font-size: 42px; letter-spacing: -0.04em; } .hero p { margin: 0; color: var(--muted); font-size: 18px; line-height: 1.6; } .panel { background: var(--panel); border: 1px solid var(--border); border-radius: 18px; padding: 24px; margin-bottom: 20px; box-shadow: 0 10px 30px rgba(15, 23, 42, 0.06); } .search-form label { display: block; margin-bottom: 10px; font-weight: 800; } .input-row { display: flex; gap: 10px; } .input-row input { flex: 1; padding: 14px 16px; border: 1px solid var(--border); border-radius: 12px; font-size: 16px; } .input-row button { padding: 0 22px; border: none; border-radius: 12px; background: var(--primary); color: white; font-size: 16px; font-weight: 800; cursor: pointer; } .input-row button:hover { background: var(--primary-hover); } .runtime-info { display: flex; flex-wrap: wrap; gap: 10px; margin-top: 14px; color: var(--muted); font-size: 13px; } .runtime-info span { padding: 6px 10px; background: #f9fafb; border: 1px solid var(--border); border-radius: 999px; } .alert { padding: 16px; margin-bottom: 20px; border-radius: 14px; background: var(--danger-bg); color: var(--danger-text); font-weight: 700; } .grid { display: grid; grid-template-columns: 1fr 1fr; gap: 20px; align-items: start; } h2 { margin-top: 0; margin-bottom: 16px; font-size: 22px; } .cve-card { padding: 18px; border: 1px solid var(--border); border-radius: 14px; margin-bottom: 14px; background: #f9fafb; } .cve-header { display: flex; justify-content: space-between; gap: 10px; align-items: center; margin-bottom: 12px; } .cve-header h3 { margin: 0; } .severity { padding: 5px 9px; border-radius: 999px; background: #111827; color: #ffffff; font-size: 12px; font-weight: 800; } dl { display: grid; grid-template-columns: 1fr 1fr; gap: 10px; margin: 0 0 14px; } dt { color: var(--muted); font-size: 12px; } dd { margin: 2px 0 0; font-weight: 700; font-size: 14px; } .description { line-height: 1.6; color: #374151; } .chips { display: flex; flex-wrap: wrap; gap: 6px; } .chips span { padding: 5px 8px; border-radius: 999px; background: #e5e7eb; color: #374151; font-size: 12px; font-weight: 700; } pre { margin: 0; white-space: pre-wrap; word-break: break-word; line-height: 1.6; } .analysis { min-height: 300px; color: var(--text); font-family: inherit; } .raw { padding: 16px; border-radius: 12px; background: var(--code-bg); color: var(--code-text); font-size: 13px; } .muted { color: var(--muted); } @media (max-width: 900px) { .grid { grid-template-columns: 1fr; } .input-row { flex-direction: column; } .input-row button { padding: 14px 22px; } .hero h1 { font-size: 34px; } }
8. Running Locally
Install the packages.
pip install -r requirements.txtSpecify the Ollama API URL and model name.
export OLLAMA_URL="http://localhost:11434/api/chat" export OLLAMA_MODEL="llama3.1"Optionally specify the NVD API Key if you have one.
export NVD_API_KEY="your-nvd-api-key"Run the Flask app.
python app.pyAccess the following address in your browser:
http://localhost:5000Try entering the following in the search bar:
CVE-2024-3094Or you can search by keyword:
opensslThree main pieces of information are displayed on the screen:
1. NVD API에서 가져온 CVE 기본 정보 2. Ollama가 생성한 한국어 취약점 분석 3. Ollama에게 실제로 전달한 요약 데이터
9. Running with Containers
If you want to run the Flask app as a container, create a Dockerfile.
FROM python:3.12-slim WORKDIR /app COPY requirements.txt . RUN pip install --no-cache-dir -r requirements.txt COPY . . EXPOSE 5000 CMD ["python", "app.py"]Build the app image.
docker build -t ollama-flask-cve-app:latest .If the Ollama container is exposing port 11434 on the host, Docker may use the following address depending on the situation:
http://host.docker.internal:11434/api/chatHowever, host.docker.internal may not always be guaranteed on Linux servers or in practice environments. The cleanest way is to put the Ollama container and the Flask app container on the same Docker network.
For example, let's assume the Ollama container name is lab-ollama.
docker network create ollama-net docker network connect ollama-net lab-ollamaNow, attach the Flask app container to the same network.
docker run --rm -it --name local-cve-analyst --network ollama-net -p 5000:5000 -e OLLAMA_URL="http://lab-ollama:11434/api/chat" -e OLLAMA_MODEL="llama3.1" ollama-flask-cve-app:latestNow, access it in your browser:
http://localhost:5000
10. Docker Compose Example
If the Ollama container is already running separately, you can manage only the app with Compose.
Create the docker-compose.app.yml file.
services: cve-app: build: . container_name: local-cve-analyst ports: - "5000:5000" environment: OLLAMA_URL: "http://lab-ollama:11434/api/chat" OLLAMA_MODEL: "llama3.1" NVD_RESULTS_PER_PAGE: "5" # NVD_API_KEY: "your-nvd-api-key" networks: - ollama-net networks: ollama-net: external: trueRun it.
docker compose -f docker-compose.app.yml up --buildIf the Ollama container name is ollama, you can change it as follows:
OLLAMA_URL: "http://ollama:11434/api/chat"The important point is that when the Flask app runs inside a container, localhost refers to the Flask app container itself, not the Ollama container. Therefore, to access the Ollama container from the app container, connecting them to the same network and using the container name as the hostname is the easiest to understand.
11. Running in a Podman Environment
If your practice script is Podman-based, you can configure it similarly.
Assume the Ollama container is running with the name lab-ollama.
podman network create ollama-net podman network connect ollama-net lab-ollamaBuild the image.
podman build -t ollama-flask-cve-app:latest .Run the app container.
podman run --rm -it --name local-cve-analyst --network ollama-net -p 5000:5000 -e OLLAMA_URL="http://lab-ollama:11434/api/chat" -e OLLAMA_MODEL="llama3.1" ollama-flask-cve-app:latestAccess the following address in your browser:
http://localhost:5000
12. Test Scenarios
The first test is a single CVE ID lookup.
CVE-2024-3094In this case, the Flask app requests the NVD API in the format cveIds=CVE-2024-3094.
The second test is a keyword search.
opensslIn this case, the Flask app requests the NVD API in the format keywordSearch=openssl.
The third test is for a non-existent CVE ID.
CVE-2099-0000In this case, a message indicating no search results should be displayed.
13. Common Errors
13.1 Ollama API Connection Failure
An example error is as follows:
Connection refusedThings to check are as follows:
curl http://localhost:11434/api/tagsIf it works on the host but not inside the app container, OLLAMA_URL is likely incorrect.
If running the Flask app locally, use the following:
export OLLAMA_URL="http://localhost:11434/api/chat"If running the Flask app in a container and the Ollama container name is lab-ollama, use the following:
export OLLAMA_URL="http://lab-ollama:11434/api/chat"
13.2 Model Not Found Error
If the Ollama response indicates that the model is missing, you must first pull that model.
ollama pull llama3.1If Ollama is running inside a container, run it as follows:
docker exec -it lab-ollama ollama pull llama3.1Or, in a Podman environment, it's as follows:
podman exec -it lab-ollama ollama pull llama3.1
13.3 NVD API 403 or Rate Limit Error
The NVD API has a rate limit even for public access. Without an API Key, there is a limit of 5 requests per 30 seconds; with an API Key, the limit is 50 requests per 30 seconds.
During practice, pressing the button multiple times may trigger the limit. In this case, wait a moment and try again.
To make it production-ready, it is recommended to add the following features:
1. NVD API 응답 캐싱 2. 동일 검색어 반복 요청 제한 3. API Key 사용 4. 사용자별 요청 제한
13.4 Response Time Too Long
If the local LLM model is large or GPU memory is insufficient, response times can be long.
In this case, adjust the following:
1. 더 작은 모델 사용 2. NVD_RESULTS_PER_PAGE 값을 1~3으로 축소 3. 프롬프트 길이 축소 4. Ollama keep_alive 설정 조정For example, reduce the number of results to 3.
export NVD_RESULTS_PER_PAGE="3"
14. Learning Points of This App
The core of this practice is that “an LLM app is not just about attaching a chat window.”
This app includes all the following concepts:
1. 웹 UI 2. Flask 백엔드 3. 외부 REST API 연동 4. 로컬 LLM API 호출 5. 프롬프트 구성 6. 컨테이너 네트워크 7. 보안 데이터 분석This structure is particularly useful in security education. It goes beyond simply displaying security data like CVE, CWE, and CVSS, allowing the LLM to transform it into explanations from an operator's perspective.
15. Next Steps: Extending to a Tool Calling Structure
In this tutorial, Flask first called the NVD API and then passed the results to Ollama.
사용자 입력 ↓ Flask가 NVD API 호출 ↓ Flask가 Ollama 호출 ↓ 최종 답변 출력In an advanced version, you can use Ollama's Tool Calling feature. Ollama supports a tool calling feature where the model calls tools and incorporates their results into the response.
The advanced structure is as follows:
사용자 입력 ↓ Ollama가 필요한 도구 판단 ↓ Flask가 해당 도구 함수 실행 ↓ 도구 실행 결과를 Ollama에 다시 전달 ↓ 최종 답변 출력However, starting with this structure from the beginning makes the explanation complex. Therefore, for an introductory tutorial, the current structure where “Flask calls external APIs, and Ollama only handles analysis” is more suitable.
16. Conclusion
In this tutorial, assuming a GPU-based Ollama container is already set up, we used Flask to create a local LLM application with a real web UI.
The completed app operates with the following flow:
CVE ID 또는 키워드 입력 ↓ NVD API에서 취약점 정보 조회 ↓ 필요한 필드만 추출 ↓ Ollama 로컬 LLM에 분석 요청 ↓ 웹 화면에 원본 정보와 AI 분석 결과 출력This example has higher practical value than a simple chatbot because it demonstrates the basic pattern of connecting external APIs with local LLMs. This pattern can be applied to extend to GitHub repository analyzers, log analysis assistants, security audit report generators, and internal document search RAG apps.
Leave a Reply