To access EC2, RDS, internal ALBs, EKS API Endpoints, etc., in a Private Subnet on AWS, Bastion Hosts were often used in the past. However, Bastion Hosts require direct operation of externally accessible servers, incurring operational burdens such as SSH port management, account management, security patching, and access log management.
One alternative that can be used in such cases is AWS Client VPN.
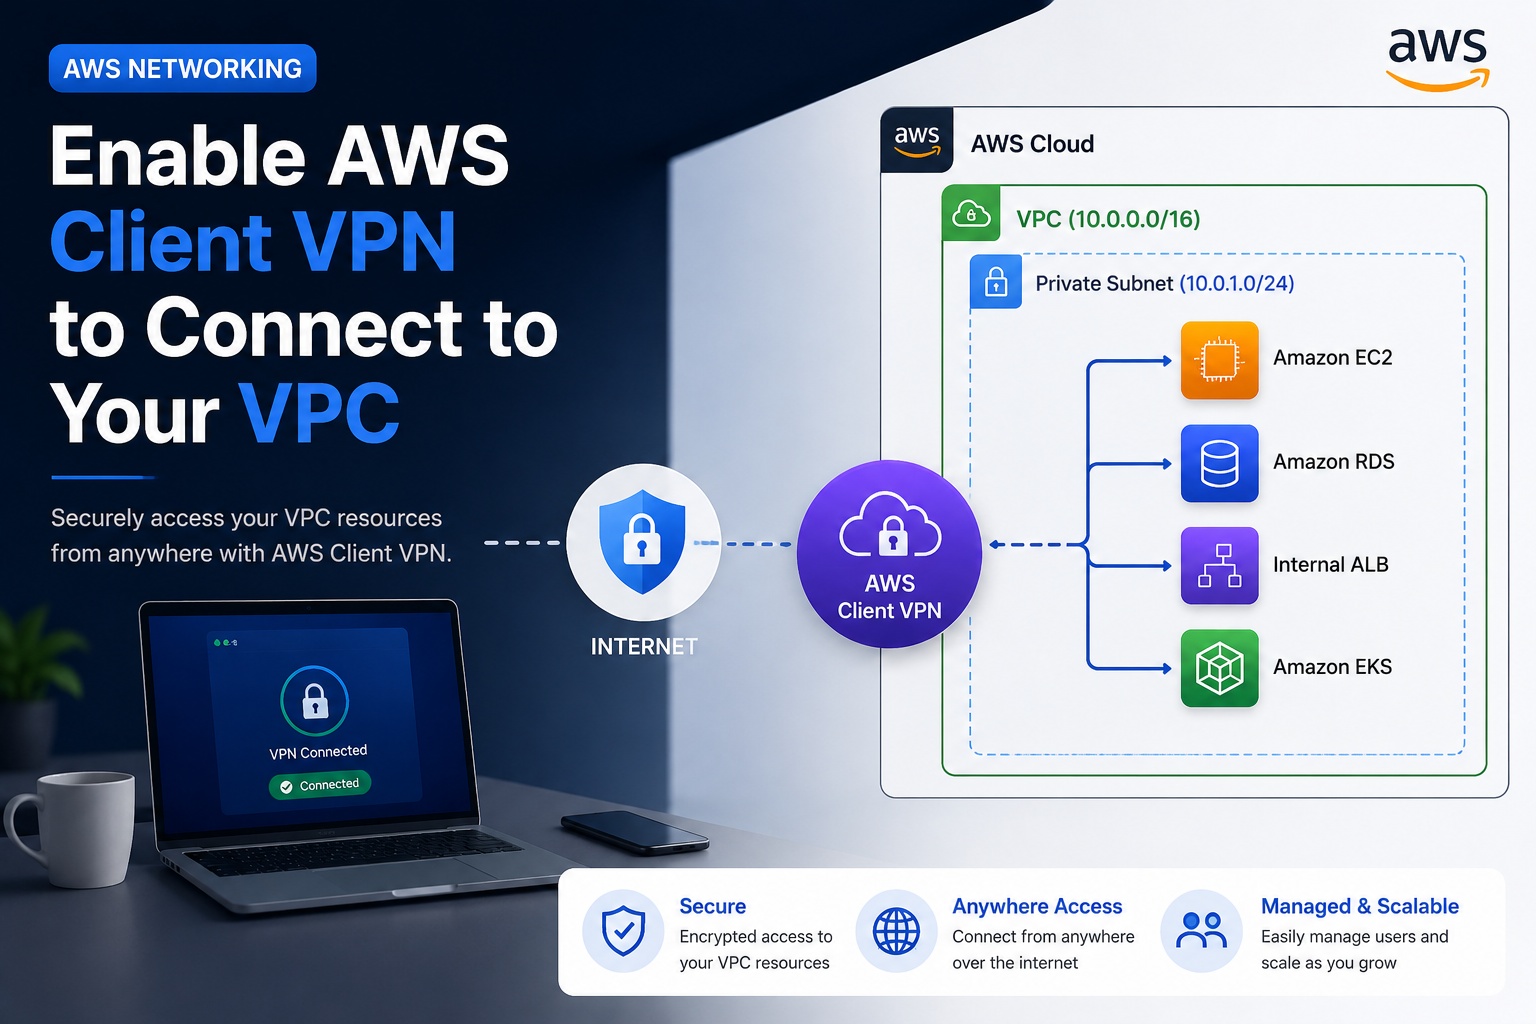
AWS Client VPN is a managed Client-to-Site VPN service that allows users to connect to the AWS VPC internal network from their laptop or PC via a VPN client. Simply put, it’s a feature that enables external users to access resources as if they were inside the VPC’s internal network through a VPN.
What is AWS Client VPN?
AWS Client VPN is a managed VPN service based on OpenVPN.
Users install the AWS VPN Client or an OpenVPN-compatible client, import the VPN configuration file provided by the administrator, and connect. Once connected, users can communicate within the VPC’s private IP range.
The simplified structure is as follows:
사용자 PC
  ↓
AWS VPN Client
  ↓
AWS Client VPN Endpoint
  ↓
VPC Private Subnet
  ↓
Private EC2 / RDS / 내부 ALB / EKS
The important point is that it’s not about “turning on VPN Client functionality” on the VPC itself, but rather creating a Client VPN Endpoint and associating this Endpoint with a Subnet in the VPC.
When is it good to use?
AWS Client VPN is useful in the following situations:
- Bastion Host 없이 Private EC2에 SSH 접속하고 싶을 때
- Private Subnet의 RDS에 로컬 PC에서 접속해야 할 때
- 내부 ALB, 내부 API, 사설 도메인에 접근해야 할 때
- 재택근무자나 외부 운영자가 VPC 내부망에 접근해야 할 때
- 사용자 단위로 VPN 접속을 제어하고 싶을 때
It can be a good option, especially in environments where you want to eliminate Bastion Hosts. While Bastion Hosts require direct operation of externally exposed EC2 instances, Client VPN is a managed service, which can reduce operational burden.
How users connect
Once the administrator configures Client VPN, users can connect relatively easily.
1. AWS VPN Client 설치
2. 관리자가 제공한 .ovpn 설정 파일 가져오기
3. VPN 프로파일 Import
4. Connect 클릭
5. VPN 연결 후 VPC 내부 리소스 접속
Once the VPN connection is established, users can directly access internal private IPs.
For example, to SSH into a Private EC2 instance, you can connect as follows:
ssh ec2-user@10.30.1.10If there’s an internal web service, you can access it via a browser using its Private IP or internal DNS.
http://10.30.1.20
http://internal-service.local
In other words, after connecting to the VPN, users access resources as if they were on the VPC’s internal network.
Overall Configuration Flow
The flow for configuring AWS Client VPN is as follows:
1. 인증 방식 준비
2. Client VPN Endpoint 생성
3. Target Network Association 설정
4. Authorization Rule 추가
5. Route Table 확인 또는 추가
6. Security Group 설정
7. Client 설정 파일 다운로드
8. 사용자 접속 테스트
The core steps can be remembered as follows:
Endpoint 생성
→ VPC Subnet 연결
→ 접근 권한 허용
→ 라우팅 설정
→ 보안 그룹 허용
→ 사용자 접속
1. Prepare Authentication Method
Client VPN performs authentication when a user connects to the VPN.
Typical authentication methods include:
1. Mutual Authentication
   - 인증서 기반 인증
   - 실습이나 소규모 환경에 적합

2. Active Directory Authentication
   - AWS Managed Microsoft AD 등과 연동

3. SAML-based Federated Authentication
   - IAM Identity Center, Okta, Microsoft Entra ID 등과 연동
   - 운영 환경에 적합
For a lab environment, certificate-based Mutual Authentication is the simplest. However, for production environments, using SAML or AD-based authentication is better from a management perspective.
2. Create Client VPN Endpoint
You can create it in the AWS Console at the following path:
VPC Console
→ Client VPN Endpoints
→ Create Client VPN endpoint
Key configuration examples are as follows:
Name tag              : client-vpn-demo
Client IPv4 CIDR      : 172.16.0.0/22
Server certificate    : ACM에 등록된 서버 인증서
Authentication        : Mutual Authentication 또는 SAML/AD
Transport protocol    : UDP
VPN port              : 443
Split tunnel          : Enable
VPC ID                : 접속할 VPC
Security Group        : Client VPN Endpoint용 Security Group
The important value here is Client IPv4 CIDR.
The Client CIDR is the IP range assigned to users connected to the VPN. For example, if set to 172.16.0.0/22, VPN users will be assigned an IP within this range.
It’s important to note that the Client CIDR must not overlap with the VPC CIDR.
For example, if your VPC is as follows:
VPC CIDR : 10.30.0.0/16The Client CIDR should be in a different range, like this:
Client CIDR : 172.16.0.0/22Client CIDR is difficult to change after creation, so it should be carefully determined during initial design.
3. Configure Target Network Association
Creating a Client VPN Endpoint does not immediately allow connection.
You must associate the Endpoint with a Subnet in the VPC. This operation is called Target Network Association.
Client VPN Endpoints
→ 생성한 Endpoint 선택
→ Target network associations
→ Associate target network
→ VPC 선택
→ Subnet 선택
This step is the core part of actually attaching the VPN Endpoint to the VPC.
It is recommended to associate at least two Subnets in different Availability Zones if possible. While it works with a single Subnet, for production environments, a configuration with two or more AZs is more suitable for high availability.
4. Add Authorization Rule
Even after associating the Target Network, users cannot immediately access the VPC internal network.
In Client VPN, you must explicitly allow users to access specific networks through Authorization Rules.
For example, to allow access to the entire VPC CIDR, configure as follows:
Destination network to enable access : 10.30.0.0/16
Grant access to                      : Allow access to all users
Description                          : Allow access to VPC
In a production environment, it’s better to restrict access scope by group rather than allowing all users full VPC access.
For example, you can divide it as follows:
개발자 그룹     → 개발 VPC만 접근
운영자 그룹     → 운영 VPC 접근
DBA 그룹        → RDS Subnet만 접근
보안 담당자 그룹 → 전체 점검 대역 접근
5. Configure Route Table
A Client VPN Endpoint has its own Route Table.
Routes determine which networks VPN users can reach.
Routes for the VPC CIDR are often automatically added during the Target Network Association process.
An example is as follows:
Destination : 10.30.0.0/16
Target      : 연결된 Subnet
However, if traffic needs to go to other VPCs, on-premises networks, or the internet, separate Routes must be added.
For example, if VPN users need internet traffic to egress through AWS, the following Route is required:
Destination : 0.0.0.0/0
Target      : 연결된 Subnet
In this case, the Subnet’s Route Table, NAT Gateway, and Internet Gateway configurations should also be checked.
Generally, if only internal network access is required, a configuration with Split Tunnel enabled is more commonly used.
Split Tunnel Enabled
→ VPC 내부 트래픽만 VPN으로 전달
→ 일반 인터넷 트래픽은 사용자 PC의 기존 인터넷 경로 사용
6. Configure Security Group
The most common stumbling block in Client VPN configuration is the Security Group.
If the VPN connection succeeds but you can’t connect to EC2 or RDS, it’s usually one of the following:
- 대상 리소스의 Security Group에서 VPN 대역을 허용하지 않음
- Client VPN Endpoint의 Security Group을 허용하지 않음
- NACL에서 차단됨
- Authorization Rule이 없음
- Route가 없음
For example, to SSH into a Private EC2 instance, the EC2 Security Group needs the following inbound rule:
Type   : SSH
Port   : 22
Source : Client VPN Endpoint Security Group
Alternatively, you can directly allow the Client CIDR.
Type   : SSH
Port   : 22
Source : 172.16.0.0/22
From an operational perspective, using Security Group referencing is generally better for management.
7. Download Client Configuration File
Once configured, you need to download the client configuration file so users can connect.
You can get it from the AWS Console at the following location:
Client VPN Endpoints
→ Endpoint 선택
→ Download client configuration
For CLI, you can use the following command:
aws ec2 export-client-vpn-client-configuration
  --client-vpn-endpoint-id cvpn-endpoint-xxxxxxxx
  --output text > client-vpn.ovpn
If using certificate-based Mutual Authentication, client certificate and private key information must be added to the .ovpn file.
<cert>
client certificate 내용
</cert>

<key>
client private key 내용
</key>
Once this file is provided to users, they can import it into the AWS VPN Client and connect.
8. Simple CLI Configuration Example
Below is a simple example of creating a Client VPN Endpoint using AWS CLI.
REGION="ap-northeast-2"
PROFILE="my-sso"

VPC_ID="vpc-xxxxxxxx"
SUBNET_ID="subnet-xxxxxxxx"
CLIENT_VPN_SG_ID="sg-xxxxxxxx"

VPC_CIDR="10.30.0.0/16"
CLIENT_CIDR="172.16.0.0/22"

SERVER_CERT_ARN="arn:aws:acm:ap-northeast-2:123456789012:certificate/server-cert-id"
CLIENT_CERT_ARN="arn:aws:acm:ap-northeast-2:123456789012:certificate/client-cert-id"
Create Client VPN Endpoint:
ENDPOINT_ID=$(aws ec2 create-client-vpn-endpoint
  --region "$REGION"
  --profile "$PROFILE"
  --client-cidr-block "$CLIENT_CIDR"
  --server-certificate-arn "$SERVER_CERT_ARN"
  --authentication-options Type=certificate-authentication,MutualAuthentication={ClientRootCertificateChainArn=$CLIENT_CERT_ARN}
  --connection-log-options Enabled=false
  --transport-protocol udp
  --vpn-port 443
  --split-tunnel
  --vpc-id "$VPC_ID"
  --security-group-ids "$CLIENT_VPN_SG_ID"
  --query 'ClientVpnEndpointId'
  --output text)

echo "$ENDPOINT_ID"
Add Target Network Association:
aws ec2 associate-client-vpn-target-network
  --region "$REGION"
  --profile "$PROFILE"
  --client-vpn-endpoint-id "$ENDPOINT_ID"
  --subnet-id "$SUBNET_ID"
Add VPC Access Authorization Rule:
aws ec2 authorize-client-vpn-ingress
  --region "$REGION"
  --profile "$PROFILE"
  --client-vpn-endpoint-id "$ENDPOINT_ID"
  --target-network-cidr "$VPC_CIDR"
  --authorize-all-groups
Download Client Configuration File:
aws ec2 export-client-vpn-client-configuration
  --region "$REGION"
  --profile "$PROFILE"
  --client-vpn-endpoint-id "$ENDPOINT_ID"
  --output text > client-vpn.ovpn
9. Connection Test
After connecting to the VPN, you can test as follows:
Private EC2 Ping Test:
ping 10.30.1.10Private EC2 SSH Connection:
ssh ec2-user@10.30.1.10Internal DNS Check:
nslookup internal-service.localInternal Web Service Check:
curl http://10.30.1.20Frequently Occurring Issues
If the VPN doesn’t connect after configuration, you should check the following items:
1. Client VPN Endpoint가 available 상태인지 확인
2. Target Network Association이 정상인지 확인
3. Authorization Rule이 추가되어 있는지 확인
4. Client VPN Route Table에 목적지 Route가 있는지 확인
5. 대상 EC2, RDS, ALB의 Security Group이 VPN 접근을 허용하는지 확인
6. NACL에서 트래픽을 차단하지 않는지 확인
7. Client CIDR과 사용자 로컬 네트워크 대역이 겹치지 않는지 확인
8. DNS 서버 설정이 올바른지 확인
Especially if the VPN connection succeeds but internal resources are inaccessible, it’s best to prioritize checking Authorization Rules, Route Tables, and Security Groups.
Compared to Bastion Host?
While AWS Client VPN and Bastion Host don’t have exactly the same purpose, Client VPN can replace Bastion Host for internal network access by operators or developers.
Bastion Host
- 외부 접속용 EC2 필요
- SSH 포트 관리 필요
- OS 패치 필요
- 계정 및 키 관리 필요
- 서버 침해 시 내부망 접근 위험

AWS Client VPN
- 관리형 VPN Endpoint 사용
- 사용자 단위 접근 제어 가능
- Private IP로 직접 접근 가능
- SAML/AD 연동 가능
- Bastion Host 없이 내부망 접근 가능
Therefore, if the purpose is “to have a Bastion Host to connect to Private EC2,” Client VPN can be a sufficiently good alternative.
However, if stronger operational control and session logging are required, it’s also good to consider AWS Systems Manager Session Manager.
Summary
AWS Client VPN is a managed VPN service that allows external users to securely access VPC internal resources.
The core of the configuration consists of these five points:
1. Client VPN Endpoint 생성
2. VPC Subnet과 Target Network Association
3. Authorization Rule로 접근 대역 허용
4. Route Table로 목적지 네트워크 지정
5. Security Group으로 실제 리소스 접근 허용
Using Client VPN allows access to Private EC2, RDS, internal ALBs, EKS API Endpoints, etc., without a Bastion Host. Especially in environments like remote work, external operator access, and developer internal network access, it can create a cleaner access structure than a Bastion Host.
In production environments, using SAML or AD-based authentication instead of simple certificate-based methods, and dividing access permissions by user group, is safer.
Reference Links:
Leave a Reply