Hello! For those preparing for the Kubernetes certification, we will delve deeply into the first essential hurdle: Pod. 🚀
The Pod, the most fundamental unit for running containers in Kubernetes, doesn’t simply mean ‘a single container’. Let’s master the structure and lifecycle of Pods, which are frequently tested, in just 10 minutes!
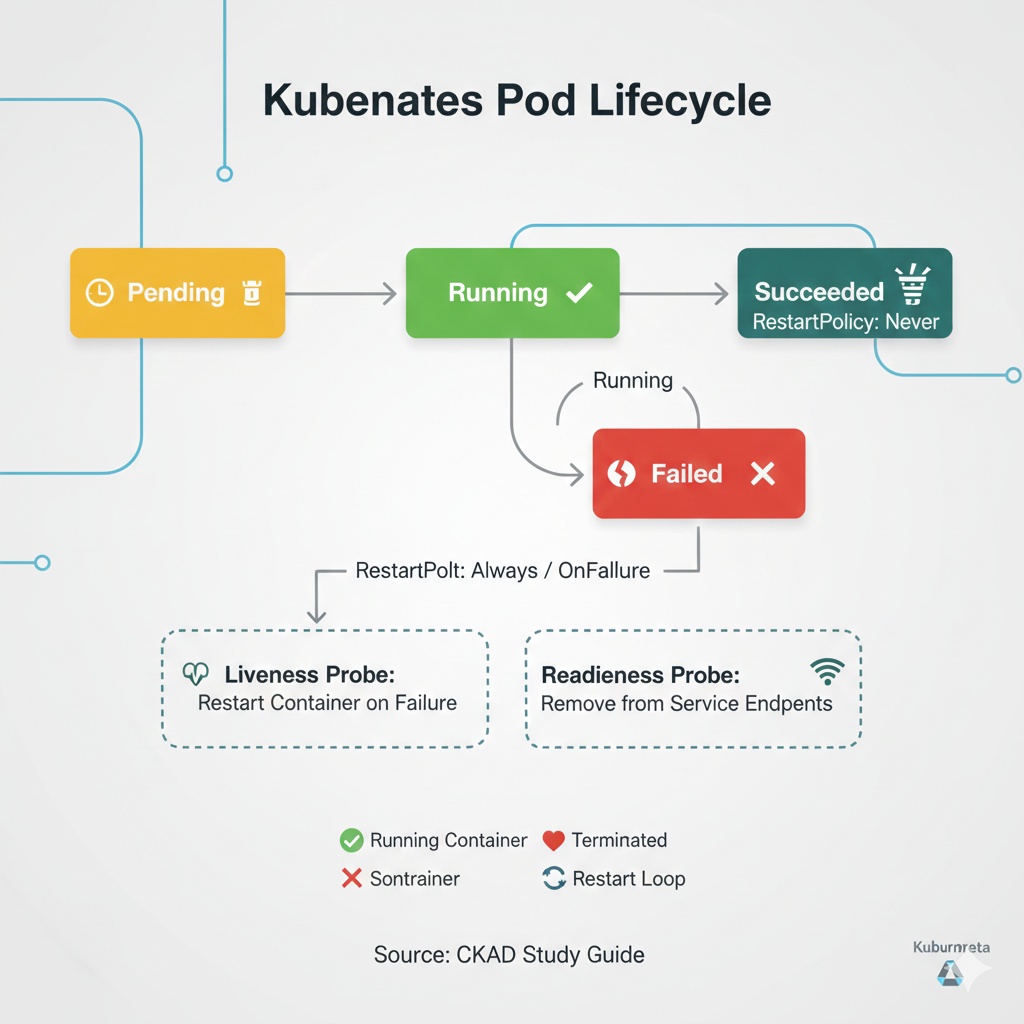
1. What is a Pod? 🧊
A Pod is the smallest deployable unit that can be created and managed in Kubernetes. It contains one or more containers, and these containers share network and storage resources.
- Co-located Neighbors: Containers within a Pod can communicate with each other via localhost. 🏠
- Shared Resources: They share data through Volumes and have the same IP address.
- Single Purpose: Typically, a Pod contains one main container, but it can also include auxiliary sidecar containers for roles like log collectors or proxies.
2. Pod Lifecycle 🔄
A Pod goes through specific phases from creation to deletion. The STATUS value you see when you run `kubectl get pod` indicates this state.
① Pending ⏳
The Pod definition has been accepted by the system, but one or more containers have not yet been created.
- This state typically occurs before being scheduled to a node or while images are being pulled (ImagePullBackOff).
② Running ✅
The Pod has been assigned to a node, and all containers have been created. At least one container is running or is in the process of starting/restarting.
③ Succeeded 🎉
All containers in the Pod have successfully terminated and will not restart. This is typically seen in Job resources that run once and complete.
④ Failed ❌
At least one container in the Pod has terminated in failure (non-zero exit code).
⑤ Unknown ❓
This occurs when the state of the Pod cannot be determined, often due to communication issues with the node.
3. Container States and Restart Policy 🛠️
Not only the Pod’s status but also the container’s status within it is important. Containers can be in one of three states: Waiting, Running, or Terminated. The `restartPolicy` determines how they behave when issues arise.
- Always (default): The container will always restart if it terminates. (Suitable for web servers, etc.)
- OnFailure: The container will only restart if it terminates with an error.
- Never: The container will never restart.
4. Diagnostic Tools: Probes 🔍
This is a heavily weighted topic in the CKAD exam. There are three ways to check if a Pod is ‘truly’ healthy.
- Liveness Probe: Checks if the container is alive. If it fails, the container is restarted.
- Readiness Probe: Checks if the container is ready to serve requests. If it fails, the Pod is removed from the Service’s endpoints. 🚫
- Startup Probe: Checks if the application inside the container has started. It disables other probes until completion.
5. CKAD Practical Tips: Troubleshooting 💡
If you encounter a Pod issue during the exam, check in the following order!
- kubectl get pods: Check the overall status and restart count.
- kubectl describe pod
: Look at the Events section at the bottom. It clearly indicates if images cannot be pulled or if scheduling is failing. ⭐ - kubectl logs
: Check error logs generated by the application inside the container.
🌟 Summary and Conclusion
- A Pod is the smallest unit in Kubernetes and shares resources among containers.
- Its lifecycle follows the flow: Pending -> Running -> Succeeded/Failed.
- Probes can be configured to maximize self-healing capabilities.
A complete understanding of the Pod lifecycle forms the fundamental muscle for tracking failures in complex MSA environments. If you get stuck while studying, feel free to ask anytime! 🎊
Leave a Reply