Hello everyone! Today, we’re going to delve deep into Deployment, one of the most frequently used resources in Kubernetes and a highly weighted topic in the CKAD exam. The era of manually managing each Pod one by one is over. Let’s master the magic of ‘declarative deployment’, where Kubernetes automatically adjusts to our desired state just by defining it, all in 15 minutes!
📑 Table of Contents
- Overview: Imperative vs. Declarative Deployment
- Deployment Structure: Replicas and Pod Template
- Update Strategies: RollingUpdate vs. Recreate
- Core of Version Management: Rollout and Rollback
- CKAD Practical Tips: Deploy with a Single Command Line
- Hands-on: Practical Exercises
0. Overview: Why Deployment? 🤔
Deployment methods in Kubernetes are broadly divided into two types:
- Imperative Deployment: This method involves directly issuing step-by-step commands like “Create 3 Pods!” or “Update the image!”. It’s intuitive but difficult to manage.
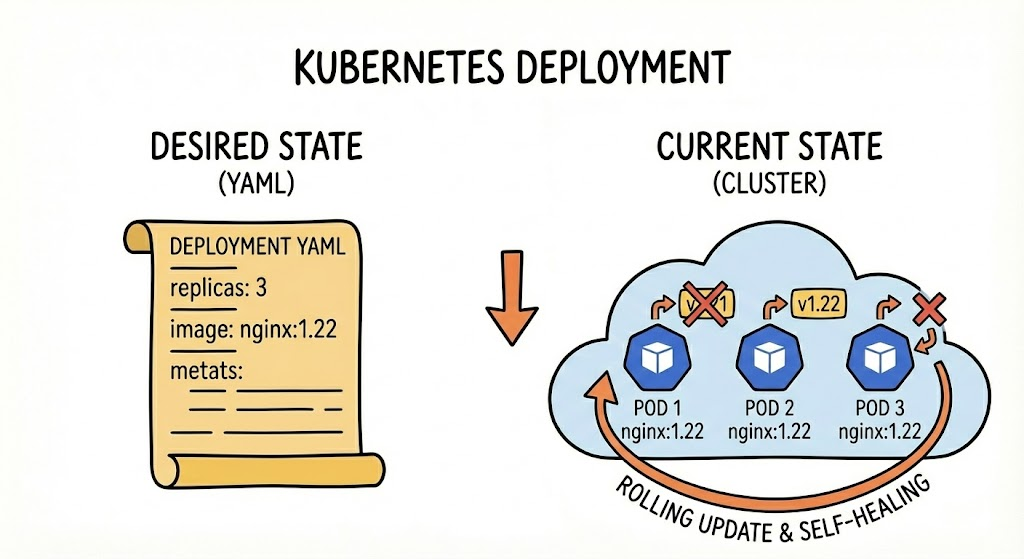
- Declarative Deployment: This method involves submitting a specification (YAML) stating, “My desired final state is ‘3 Pods’ using ‘Nginx image version 1.21’.” Kubernetes constantly monitors and self-recovers to maintain this Desired State.
The core controller that realizes this declarative deployment is Deployment.
1. Deployment Structure: What and How Many? 🏗️
A Deployment YAML file is largely divided into three parts:
- Replicas: The number of Pods to maintain.
- Selector: The ‘label’ lookup rule that determines which Pods the Deployment will manage.
- Template: Defines the shape of the actual Pods to be created (image, port, environment variables, etc.).
💡 Key YAML Structure
apiVersion: apps/v1
kind: Deployment
metadata:
  name: web-deployment
spec:
  replicas: 3 # Maintain the number of Pods
  selector:
    matchLabels:
      app: my-web # Manages Pods with this label
  template:
    metadata:
      labels:
        app: my-web # Label to be attached to the created Pod
    spec:
      containers:
      - name: nginx
        image: nginx:1.21
        ports:
        - containerPort: 80
2. Update Strategies: Zero-Downtime Deployment 🔄
One of Deployment’s biggest advantages is the ability to update applications without interrupting service.
1) RollingUpdate (Default)
This strategy involves terminating old Pods one by one while creating new version Pods one by one. Users hardly notice any service interruption.
- maxSurge: Configures how many more Pods than the desired count can be created during an update.
- maxUnavailable: Configures the maximum number of unavailable Pods during an update.
2) Recreate
This strategy involves terminating all existing Pods at once, then creating new version Pods. This causes temporary service downtime but is used in environments where old and new versions cannot coexist.
3. Core of Version Management: Rollout and Rollback ⏪
What if a deployment goes wrong? Don’t panic. Deployment records deployment history, allowing you to revert to a previous state at any time.
- Check deployment status: kubectl rollout status deployment/my-deploy
- Check deployment history: kubectl rollout history deployment/my-deploy
- Revert to previous version: kubectl rollout undo deployment/my-deploy
- Revert to specific version (revision 2): kubectl rollout undo deployment/my-deploy –to-revision=2
4. CKAD Practical Tips: Speed is Key to Passing! ⏱️
In the exam, there’s no time to type YAML from scratch. Utilize commands as much as possible.
1) Quickly Create a Deployment with Commands
# Create a deployment using the nginx image (3 Pods)
kubectl create deployment my-web --image=nginx:1.21 --replicas=3
2) Update Image (Frequent Exam Question!)
kubectl set image deployment/my-web nginx=nginx:1.223) Scaling (Increase/Decrease Pod Count)
kubectl scale deployment/my-web --replicas=55. Hands-on: Practical Exercises 🛠️
Scenario:
- Create a Deployment named `app-deploy`. (Image: httpd:2.4.48, Replicas: 2)
- Update the image to httpd:2.4.49 and monitor the deployment process.
- Assume there’s an issue with the update, and immediately roll back to the previous version (2.4.48).
[Solution Guide]
# 1. Create
kubectl create deployment app-deploy --image=httpd:2.4.48 --replicas=2

# 2. Update and verify
kubectl set image deployment/app-deploy httpd=httpd:2.4.49
kubectl rollout status deployment/app-deploy

# 3. Rollback
kubectl rollout undo deployment/app-deploy
Wrapping Up 🏁
Deployment is not just a tool for launching multiple Pods. “Declaring the desired state and trusting Kubernetes to maintain that state” – this is the core of Kubernetes-native operations.
Mastering the update strategies and rollback features learned today will not only ensure stable deployments in practice but also bring you one step closer to your CKAD certification! 🌟
Leave a Reply