When operating a Kubernetes cluster, situations often arise where you need to explicitly place a specific pod on a desired node. Today, we will provide a detailed overview of nodeName and nodeSelector, the most intuitive and fundamental scheduling methods.
1. What is Pod Scheduling? 📍
In Kubernetes, scheduling is the process of determining which appropriate node a pending pod will be assigned to and executed on. By default, the kube-scheduler automatically places pods by checking the node’s resource status, but when an administrator needs direct control, nodeName and nodeSelector are used.
2. The Most Powerful and Simple Method: nodeName 🎯
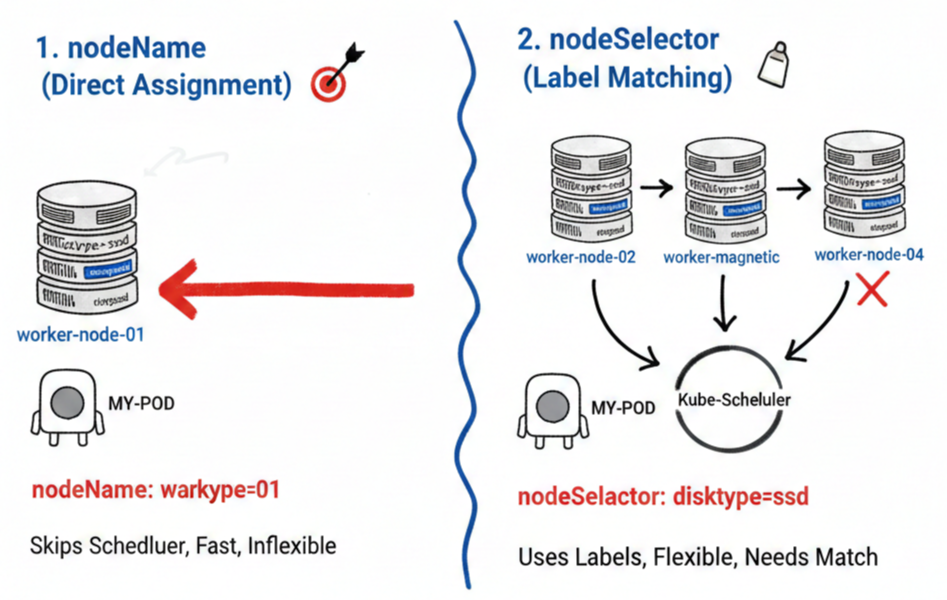
nodeName completely bypasses the scheduler’s complex calculations, forcing a pod to be placed on a specific node by explicitly naming it.
- Features: It bypasses the kube-scheduler and directly requests the kubelet on the specified node to run the pod.
- Advantages: Very fast and definitive.
- Disadvantages: Absolutely no flexibility. If the node with that name does not exist or lacks resources, the pod will not run.
💻 Example YAML Configuration
YAML
apiVersion: v1
kind: Pod
metadata:
  name: nodename-pod
spec:
  containers:
  - name: nginx
    image: nginx
  nodeName: worker-node-01 # Must be assigned to this node only
3. Flexible Selection Based on Labels: nodeSelector 🏷️
nodeSelector is a method that selects a group of nodes for pod assignment based on the
labels
set on the nodes. It is currently the most recommended basic scheduling method in Kubernetes.
- Features: Pods are placed only on nodes that have labels matching the key-value pairs defined in the pod specification.
- Usage Flow:
- Assign labels to nodes.
- Specify the corresponding labels in the nodeSelector of the pod’s YAML.
🛠️ Assigning Labels to Nodes
First, assign unique characteristics to nodes from the terminal.
Bash
kubectl label nodes worker-node-02 disktype=ssd💻 Example YAML Configuration
YAML
apiVersion: v1
kind: Pod
metadata:
  name: nodeselector-pod
spec:
  containers:
  - name: nginx
    image: nginx
  nodeSelector:
    disktype: ssd # Placed only on nodes with the 'disktype=ssd' label
4. nodeName vs nodeSelector Comparison Summary 📊
| Category | nodeName | nodeSelector |
| — | — | — |
| Method | Directly specify node name | Specify node labels as conditions |
| Scheduler Intervention | X (Bypasses scheduler) | O (Scheduler searches for conditions) |
| Flexibility | Very low (Fixed) | Medium (Selects among nodes with same labels) |
| Recommended Use | For debugging specific node failures | When specific hardware (GPU, SSD) is required |
—
5. Cautions and Limitations ⚠️
- Case Sensitivity: Label keys and values are strictly case-sensitive.
- Match Requirement: All labels specified in nodeSelector must exist on the node. If even one does not match, the pod will remain in a Pending state.
- Complex Conditions: Complex logic such as “Node A or B”, or “exclude nodes without a label” is difficult to implement with nodeSelector. In such cases, the higher-level concept of Node Affinity should be used.
We hope this information helps you efficiently manage your cluster resources.
Leave a Reply