Hello everyone! If you’ve managed Linux systems, you’ve probably experienced the frustration of running out of hard disk space, right? Once a partition is set, changing it later is incredibly tricky, leading to the pressure of getting the capacity estimation right from the start. 😩
Today, I’d like to introduce LVM (Logical Volume Manager), a powerful and flexible disk management tool that solves these very problems. With LVM, you can freely combine, divide, and expand storage space as if assembling LEGO blocks.
In this post, I’ll explain the core concepts of LVM – PV, VG, LV – and the pvcreate command in the easiest way possible!
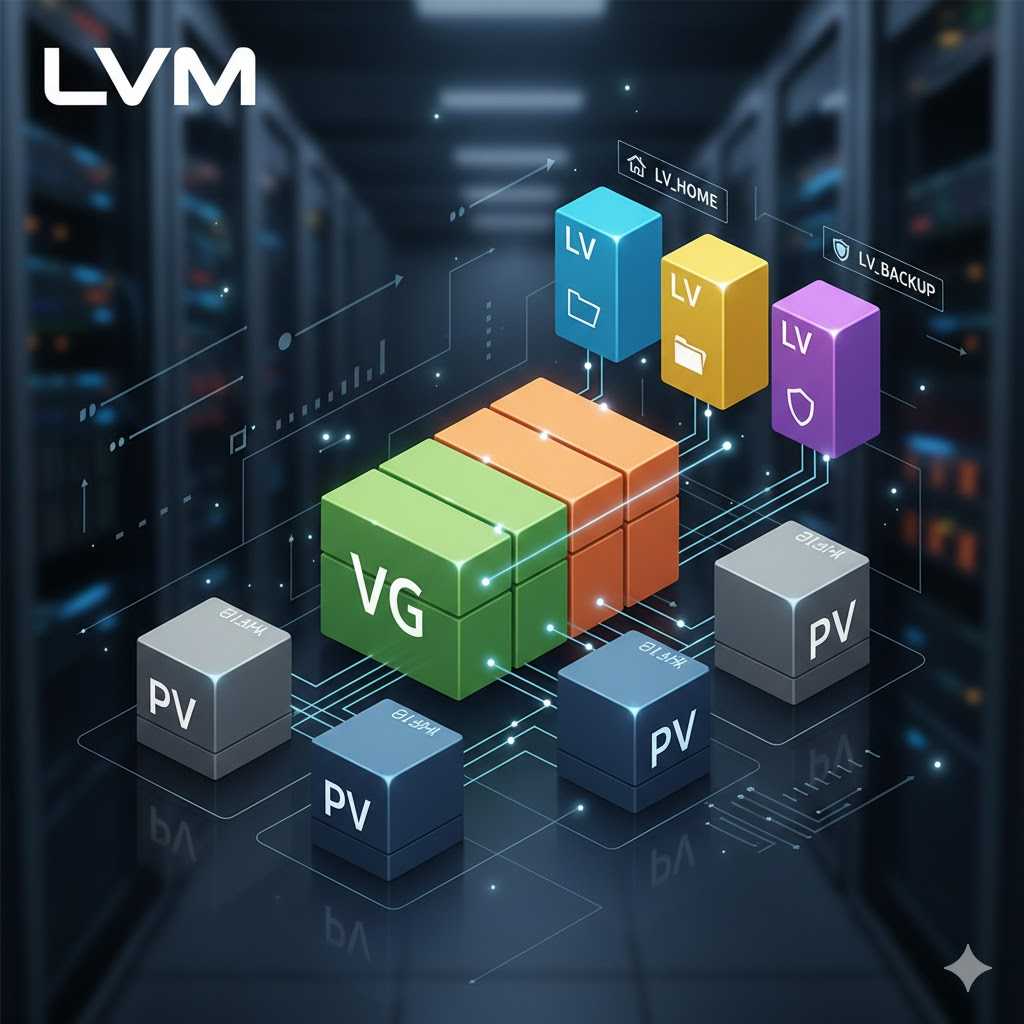
🤔 What is LVM? Why should I use it?
LVM stands for Logical Volume Manager. It’s a kernel feature and program that allows you to flexibly manage multiple hard disks or partitions as a single, large storage unit in logical terms.
Let’s consider traditional partitioning (e.g., /dev/sda1, /dev/sda2). This method is like carving a masterpiece from a single large stone. Once divided, it’s very difficult to change its size or combine it with other pieces.
In contrast, LVM is like gathering multiple LEGO blocks (hard disks/partitions) to create a large LEGO baseplate (storage pool), and then freely building works (partitions to be used) of desired size and shape on top of it. If needed, you can later add more blocks to expand the baseplate, or increase/decrease the size of your creations! ✨
Thanks to this flexibility, it offers the following advantages:
- Dynamic Partition Resizing: You can easily increase or decrease the size of partitions (logical volumes) even while the system is in use.
- Multiple Disk Integration: You can combine multiple physical disks to use them as a single large disk.
- Snapshot Feature: The snapshot feature allows you to copy the file system at a specific point in time, enabling safe backup and recovery.
🧱 Step 1: Creating Physical Volumes (PV)
The most fundamental ingredient for LVM is the Physical Volume (PV).
What is a PV (Physical Volume)? It refers to an entire physical hard disk (e.g., /dev/sdb) or a partition within a disk (e.g., /dev/sdb1) that has been ‘prepared’ for use with LVM. It is the smallest physical unit in LVM, equivalent to a ‘LEGO block’.
Simply attaching a hard disk doesn’t automatically make it an LVM ingredient. This disk (or partition) needs to be tagged with a ‘label’ indicating, “This will now be used as an LVM ingredient.”
pvcreate command: Transforming into LVM material!
The command used for this is pvcreate.
What is pvcreate? It’s short for Physical Volume Create, and it’s a command that initializes a specific disk or partition as a PV (Physical Volume) by writing metadata (a label) to it, indicating that it can be used by LVM.
Usage
# Create a PV from the entire /dev/sdb disk
$ pvcreate /dev/sdb

# Create a PV from the /dev/sdc1 partition
$ pvcreate /dev/sdc1
When this command is executed, the disk or partition becomes an LVM ingredient, i.e., a PV. You can check which PVs are currently on the system using the pvs or pvdisplay commands.
📦 Step 2: Grouping into a Volume Group (VG)
Now that several LEGO blocks (PVs) are ready, the next step is to gather these blocks to create a large LEGO baseplate (storage pool). This is what a Volume Group (VG) is.
What is a VG (Volume Group)? It is a massive, integrated storage pool created by combining one or more PVs (Physical Volumes). A VG is essential for users to allocate space of their desired size.
For example, if you combine two 1TB PVs and one 500GB PV into a VG named my_storage, you’ll have a massive single storage space of 2.5TB. The biggest advantage of a VG is that you can easily expand its capacity later by adding new PVs (vgextend).
You can create a VG using the vgcreate command.
# Create a volume group named 'vg_data' by combining /dev/sdb and /dev/sdc1
$ vgcreate vg_data /dev/sdb /dev/sdc1
🏠 Step 3: Allocating Logical Volumes (LV)
Now that the giant LEGO baseplate (VG) has been created, it’s time to create the ‘works’ (partitions) that users will actually use. These are called Logical Volumes (LV).
What is an LV (Logical Volume)? It is a logical partition created by allocating the necessary capacity from a storage pool called a VG (Volume Group). Users format and mount this LV to use it as a space for storing actual data.
You can freely create LVs of various sizes, such as for home, data, or backup, within the capacity allowed by the VG, to suit your specific needs.
You create an LV using the lvcreate command.
# Create a logical volume named 'lv_webdata' with a size of 10GB from the 'vg_data' volume group
$ lvcreate -L 10G -n lv_webdata vg_data
The LV created this way can be accessed via paths like /dev/vg_data/lv_webdata. You can then format it with commands like mkfs.xfs or mkfs.ext4 and mount it to your desired directory for use.
✨ In Summary
Let’s summarize how LVM works once more:
- pvcreate: Transforms a hard disk or partition into an LVM ingredient (PV). 🧱
- vgcreate: Gathers prepared PVs to create a large storage pool (VG). 📦
- lvcreate: Allocates space from the VG to create a partition (LV) for user use. 🏠
- Format and Mount: Formats the created LV and connects it to a directory for use. 🚪
LVM might seem a bit complex at first, but once you understand its structure, Linux storage management becomes much more flexible and convenient. Don’t be constrained by partition capacity worries anymore; build a flexible and powerful storage environment with LVM!
Tags: LVM, Linux, PV, VG, LV, pvcreate, Logical Volume Manager, Storage, Linux, Partition Management
Leave a Reply