Hello! If you’ve been operating a Linux server, you’ve probably wondered at some point, “My partition is running out of space, can’t I expand it?” or “I want to combine two disks and use them as one…” The powerful solution that allows you to go beyond the limitations of physical disks and manage storage like Lego blocks is LVM (Logical Volume Manager).
Today, I’ll provide a detailed guide, from understanding what LVM is to the entire process of adding a new hard disk, creating a new logical volume, and using it. If you follow this post, you’ll quickly become familiar with LVM! 🚀
LVM, why should we use it? 🤔
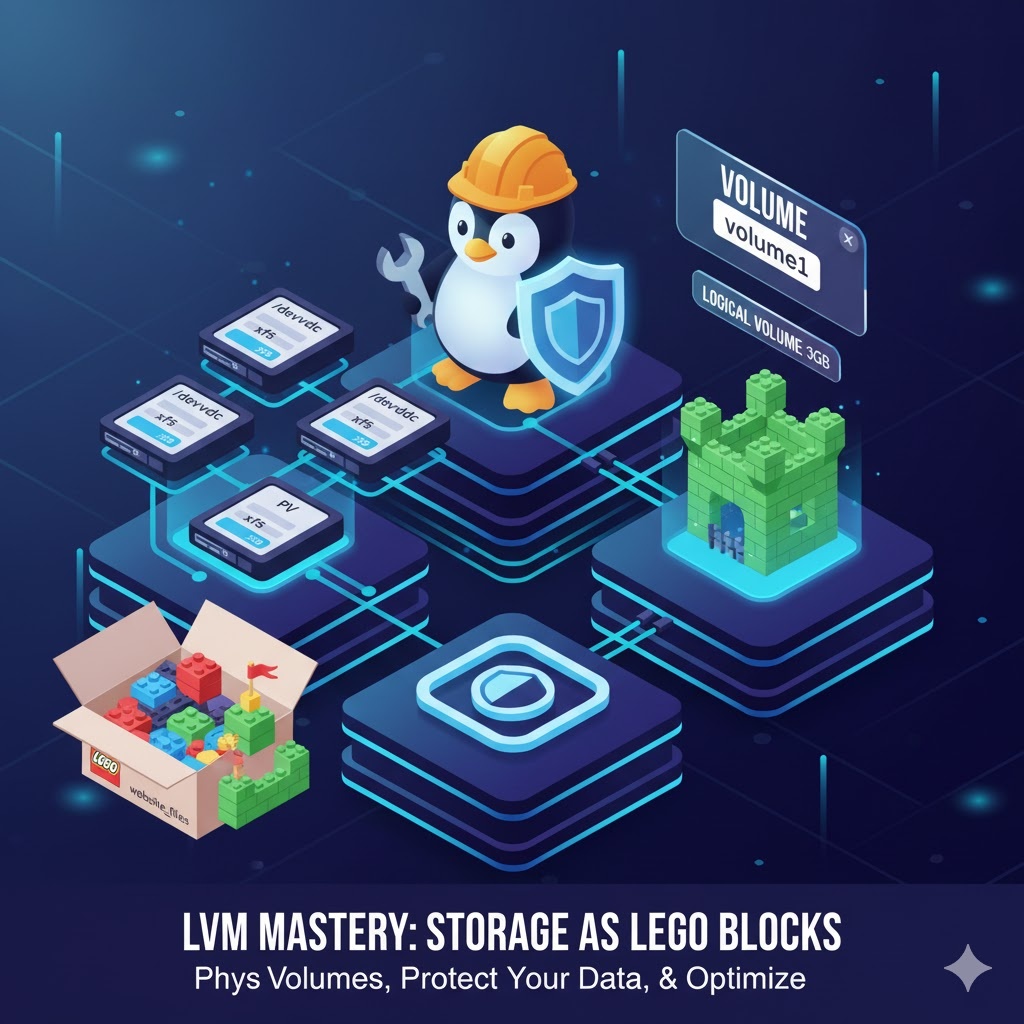
To understand LVM, imagine Lego blocks.
- Physical Volume (Physical Volume, PV): This is the actual disk or partition to be used in LVM. It’s the ‘Lego block’ itself, in various shapes and sizes. 🧱
- Volume Group (Volume Group, VG): This is a single, giant ‘Lego box’ that holds all these Lego blocks. You can keep adding blocks to the box. 📦
- Logical Volume (Logical Volume, LV): This is a ‘Lego castle’ built by combining blocks from the box. It’s the space where we actually store and use data. If the castle is small, you can bring more blocks to make it bigger. 🏰
As such, LVM groups disks (PVs) into one large storage pool (VG), and then creates logical partitions (LVs) of the required size for use.
Key advantages of LVM:
- Flexible resizing: You can easily expand or shrink file systems even while they are online.
- Multiple disk integration: Multiple physical disks can be combined into a single volume group to be used as one large storage space.
- Snapshot feature: You can copy a file system at a specific point in time and safely use it for backup or testing.
LVM Practical Guide: Create a Logical Volume in 3 Steps 🚀
Now, assuming you’ve added new disks /dev/vdc and /dev/vdd to your server, let’s create a new 3GB logical volume using these two disks.
Step 1: Create Physical Volumes (PV) 🧱
First, we need to mark these disks so that the Linux system recognizes them as ‘Lego blocks’ for LVM.
sudo pvcreate /dev/vdc /dev/vddThis pvcreate command initializes /dev/vdc and /dev/vdd disks as physical volumes that LVM can use.
✅ Check: Use the pvs command to verify that the physical volumes have been created correctly.
sudo pvs# Example resultPV VG Fmt Attr PSize PFree/dev/vdc lvm2 --- /dev/vdd lvm2 --- Step 2: Create Volume Group (VG) 📦
Now it’s time to put the prepared Lego blocks (PVs) into one large ‘Lego box (VG)’. Let’s create a volume group named volume1.
sudo vgcreate volume1 /dev/vdc /dev/vddThe vgcreate command creates a new volume group named volume1, with /dev/vdc and /dev/vdd as members.
✅ Check: Use the vgs command to check the list of volume groups.
sudo vgs# Example resultVG #PV #LV #SN Attr VSize VFreevolume1 2 0 0 wz--n- You can see that the VSize (total size) combines the capacities of the two disks.
Step 3: Create Logical Volume (LV) 📁
Finally, it’s time to use the blocks in the box to build our desired ‘Lego castle (LV)’. We will allocate 3GB from the volume1 volume group to create a logical volume named website_files.
sudo lvcreate -n website_files -L 3G volume1Full command option analysis!
- -n website_files: Specifies the name of the logical volume to be created.
- -L 3G: Sets the logical volume size to 3 Gigabytes. (You can also allocate by percentage using the -l option.)
- volume1: Specifies which volume group to allocate space from.
✅ Check: Use the lvs command to finally verify that the logical volume has been created correctly.
sudo lvs# Example resultLV VG Attr LSize Pool Origin Data% Meta% Move Log Cpy%Sync Convertwebsite_files volume1 -wi-a----- 3.00g✨ The Most Important Final Step: Create File System and Mount
Congratulations! Logical volume creation is complete. However, it’s currently an ’empty shell’ where you cannot store files. To store data, you need to format it with a file system and connect (mount) it to a specific directory.
- Create File System (Format) The path to the newly created logical volume follows the format /dev/volumegroupname/logicalvolumename. Let’s format this volume with the xfs file system.
sudo mkfs.xfs /dev/volume1/website_files- Create Mount Point and Mount Now, create a directory to connect this logical volume and mount it.
# Create a directory to store website files.sudo mkdir -p /var/www/website# Mount the logical volume to the created directory.sudo mount /dev/volume1/website_files /var/www/websiteNow, if you save files to the /var/www/website path, your data will be safely written to the new storage we configured with LVM! (Don’t forget to register it in /etc/fstab if you want automatic mounting on reboot!)
Concluding 🎬
LVM might seem a bit complex at first, but once you understand its structure and a few commands, you’ll be able to manage server storage much more flexibly and powerfully, going beyond the limitations of physical disks. I encourage you to experience the infinite possibilities of LVM firsthand, such as extending capacity with lvextend when it’s low, or safely backing up with snapshots when needed!
Tags: Linux, LVM, Storage, Server Management, Logical Volume, Volume Group, pvcreate, vgcreate, lvcreate, DevOps, Filesystem, Disk Management
Leave a Reply